Azure Active Directory with OpenID Connect
Turbo Server can be configured to allow users to log in via Azure Active Directory (Azure AD) Single Sign-On (SSO) using the OpenID Connect (OIDC) authentication protocol.
For prerequisites and additional information about the OpenID Connect authentication protocol, please refer to the OpenID Connect Prerequisites section.
Configure Azure AD
The following section describes how to configure your Azure AD using the Azure Portal for use with Turbo Server.
To enable Azure AD SSO, a new application must be registered in your Azure AD tenant. Although it is possible to use the Service Principal account for authentication, we strongly recommend creation of a separate application with permissions only to authenticate users against Azure AD.
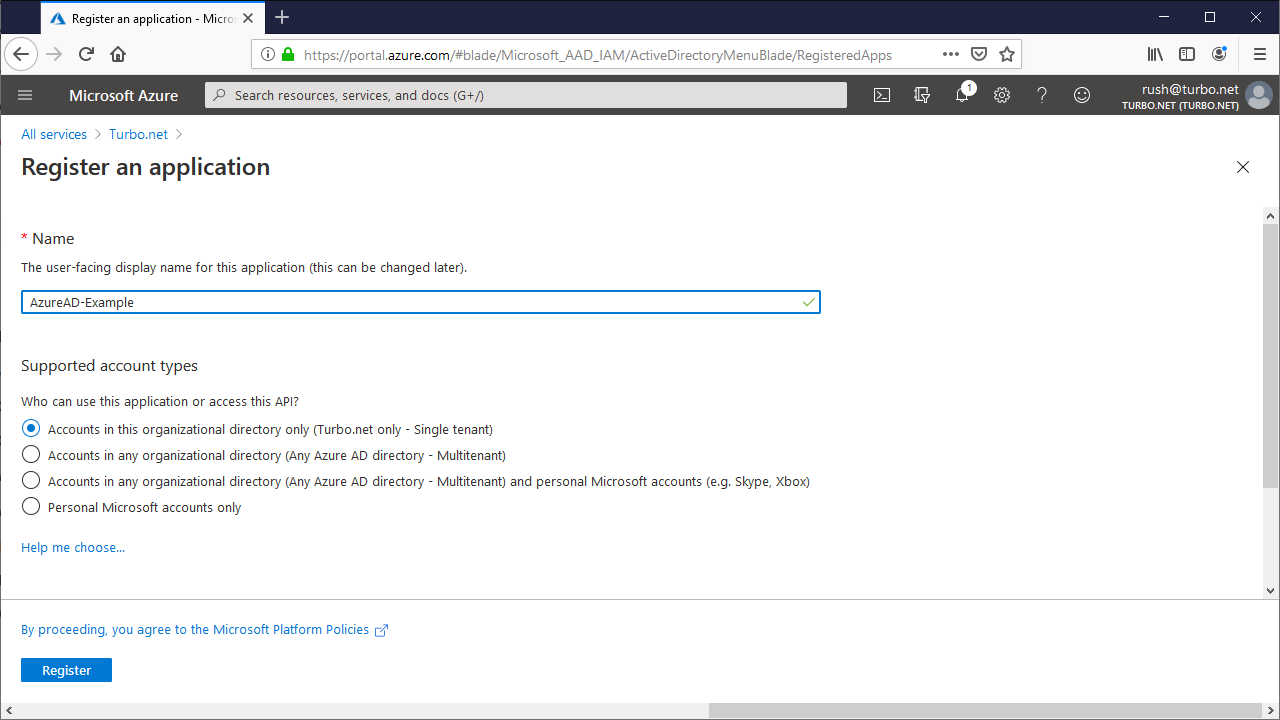
To create the application, log into your Azure Portal, navigate to the App registrations page and click New registration. Enter the following fields and submit the form:
- Name: Your desired display name for this application.
- Supported account types: The account types that are allowed to login. To allow logins from multiple specific tenants, see Azure AD Multi-Tenancy.
Once created you will be redirected to the Overview page. Click on the Endpoints link in the header and save the OpenID Connect metadata document URL so that it can be added to Turbo Server later.
Authentication
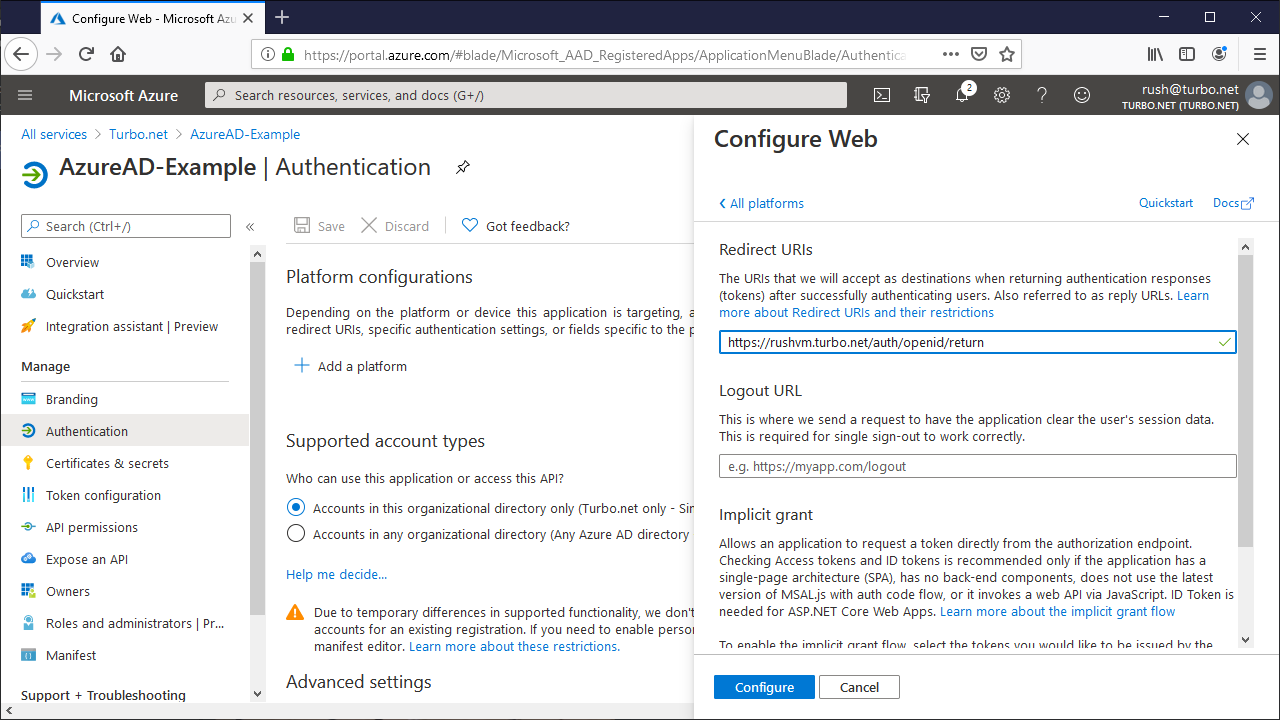
From the Authentication tab, click Add a platform and follow the setup guide using the following fields:
Platform: Web
Redirect URI: The default reply URL for the Azure AD response. This must match the endpoint listed on the Turbo Server authentication method page. For example: https://{Web Service Root}/auth/openid/return.
Implicit Grant: ID tokens
Supported account types: Select Accounts in this organization directory only for single-tenant and Accounts in any organizational directory for multi-tenant.
API Permissions
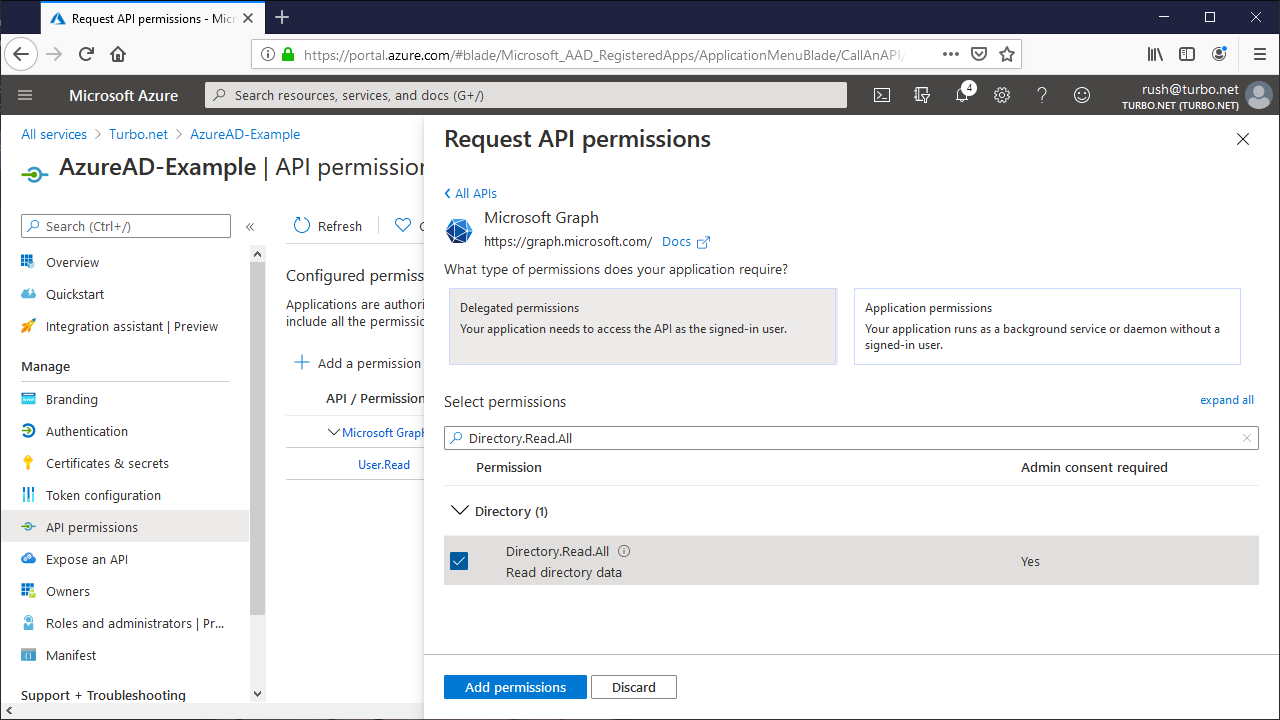
From the API permissions tab, click Add a permission and add the following permissions:
- Microsoft Graph > Delegated permissions > User > User.Read
- Microsoft Graph > Delegated permissions > Directory > Directory.Read.All
The User.Read permission allows Turbo to create a Turbo account with the user's basic profile information upon successful Azure AD authentication.
The Directory.Read.All permission allows access control of Turbo Portal content based on Active Directory group membership. To access this information, Turbo uses the memberOf method of the Microsoft Graph API.
Click Grant admin consent and Save to grant consent on behalf of all users in this directory, ensuring that end users will not be required to consent when using the application.
Client Secret
From the Certificates & secrets tab, click New client secret and enter your desired description and expiration date. Once created, save the Client Secret value so that it can be added to Turbo Server later.
Configure Azure AD for Mobile Clients
To enable SSO from mobile clients you must register a new Azure AD native client application that is separate from the Azure AD web application registration. Follow the Configure Azure AD instructions to create a new application registration, replacing the Web platform in the Authentication section with Mobile and desktop applications, and leaving the Certificates & secrets section blank.
Client applications are not configured with secrets because they run on the user's device and are not trusted to keep the secret. The web application runs as part of Turbo Server so it's considered a confidential client and is trusted to keep the secret. Please refer to the Microsoft documentation for more information.
To check that the application is a native application, navigate to the Azure Portal app registration manifest and verify the manifest has the field "allowPublicClient": true.
Configure Turbo Server
Once you have configured Azure AD, you are ready to enable SSO on Turbo Server.
Open the Turbo Server administration site and navigate to the Users > Authentication Method page. Change the Authentication Method to Single Sign-On and the Single Sign-On Method to OpenID Connect.

Fill in the following fields according to the Azure AD configuration:
- Provider Metadata URL: The OpenID Connect metadata document from your application registrations overview > endpoints page.
- Web Application ID: The Application ID from your web application registration overview page.
- Web Application Secret: The Client Secret from your web application registration's certificates & secrets page.
- Native Application ID: The Application ID from your native client application registration overview page.
Azure AD Multi-Tenancy
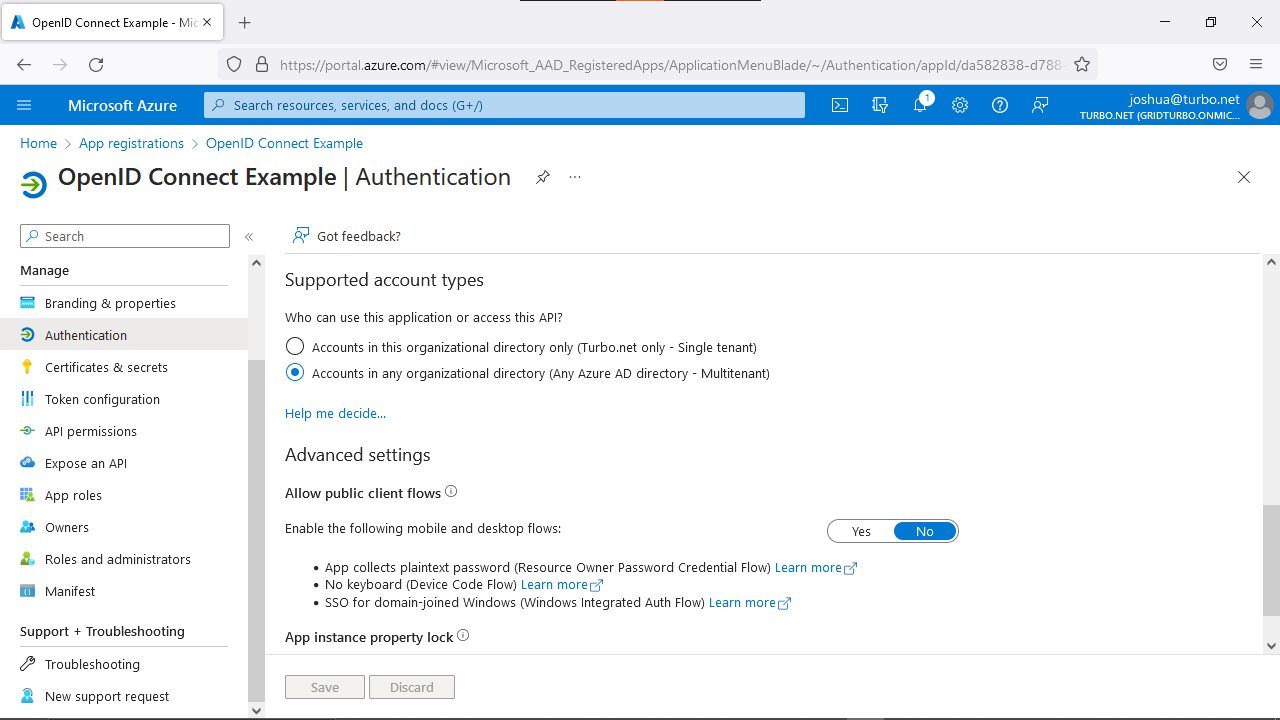
Multi-tenancy allows users from different Azure AD tenants to login to Turbo Server using the same SSO configuration.
To configure multi-tenancy, view the Azure AD OIDC application from Application Registrations. On the Authentication tab, go to Supported account types and select Accounts in any organizational directory (Any Azure AD directory - Multitenant).
To only allow specific Azure AD tenants, see Administering Authentication Method.
Troubleshooting Azure AD via OpenID Connect
Application Registration Permissions
You may review which permissions the app registration requires by forcing the consent dialog to appear during login. To do so, please consult to Microsoft docs: https://docs.microsoft.com/en-us/azure/active-directory/manage-apps/configure-user-consent#force-user-consent-through-a-url-request
AADSTS50105: Your administrator has configured the application to block users unless specifically granted access
When Assignment required? is enabled for the Azure AD Application and the user is not assigned access or is not part of a group with access to the application, the SSO login fails with the following error message:
AADSTS50105: Your administrator has configured the application [Application Name] ('[Application ID]') to block users unless they are specifically granted ('assigned') access to the application. The signed in user '[User ID]' is blocked because they are not a direct member of a group with access, nor had access directly assigned by an administrator. Please contact your administrator to assign access to this application.

To grant access to all users in your Azure AD, disable Assignment required? in the Azure Portal > Enterprise Applications > Application Name > Manage > Properties.

To limit access to specified users and/or groups, use the Add user/group button in Azure Portal > Enterprise Applications > Application Name > Manage > Users and Groups. When using groups, ensure that the allowed users are direct members of the specified group.
