Azure Active Directory with SAML 2.0
Turbo Server can be configured to allow users to log in via Azure Active Directory (Azure AD) Single Sign-On (SSO) using the SAML 2.0 authentication protocol.
For prerequisites and additional information about the SAML 2.0 authentication protocol, please refer to the SAML 2.0 Prerequisites section.
Configure Azure AD
The following section describes how to integrate Turbo Server with Azure AD SSO using SAML 2.0.
Important: Azure AD group claims using sAMAccountName are not supported for groups created in Azure AD or Office 365. Applications configured in Azure AD to synchronize on-premises group attributes will receive these attributes for synced groups only. If group names are used for Turbo workspace application permissions, it is recommended to configure Azure AD with OpenID.
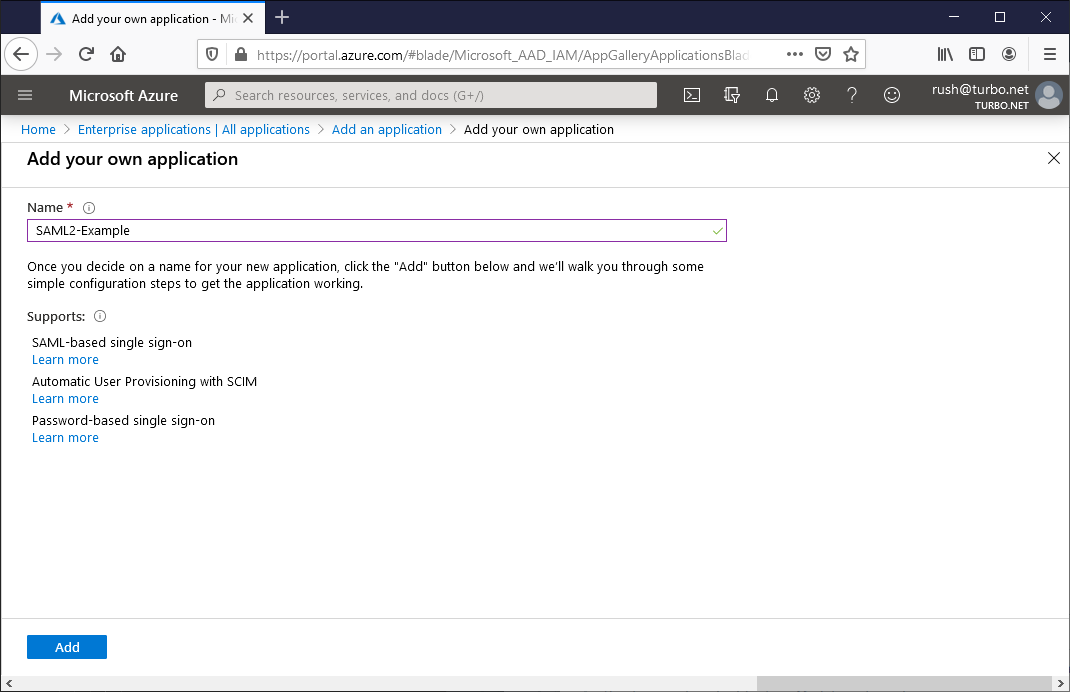
To enable Azure AD SSO, a new Enterprise Application must be registered in your Azure AD tenant. From your Azure AD homepage, click Enterprise applications and then New Application. Enter your desired name then click Add.
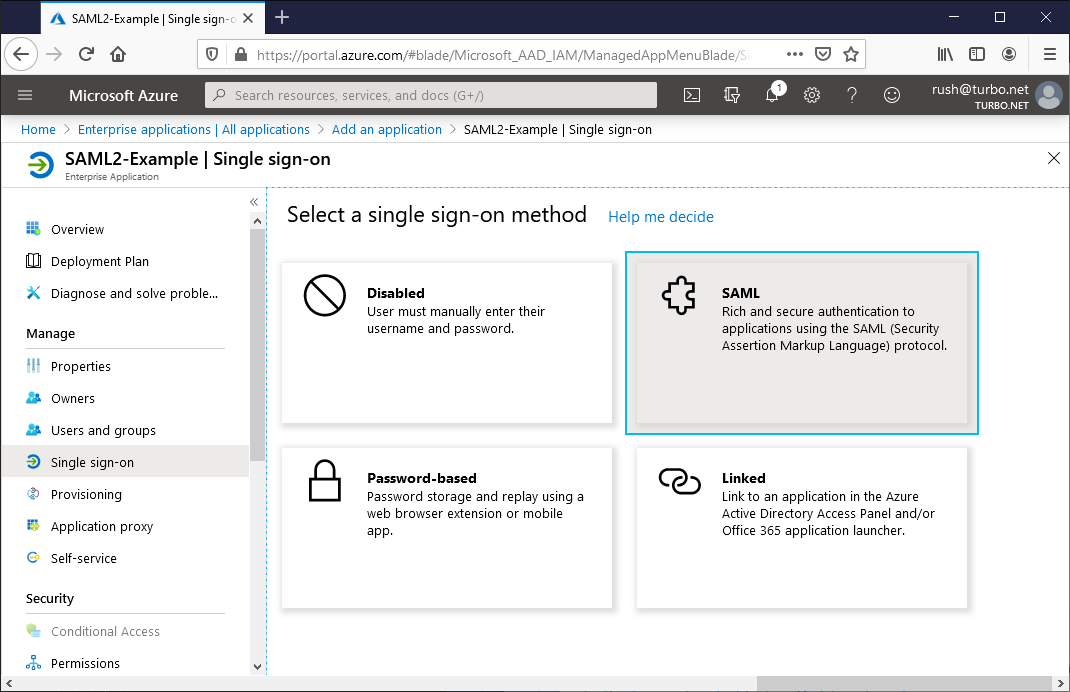
Once the application has been created, click on the Single sign-on tab and select the SAML authentication method.
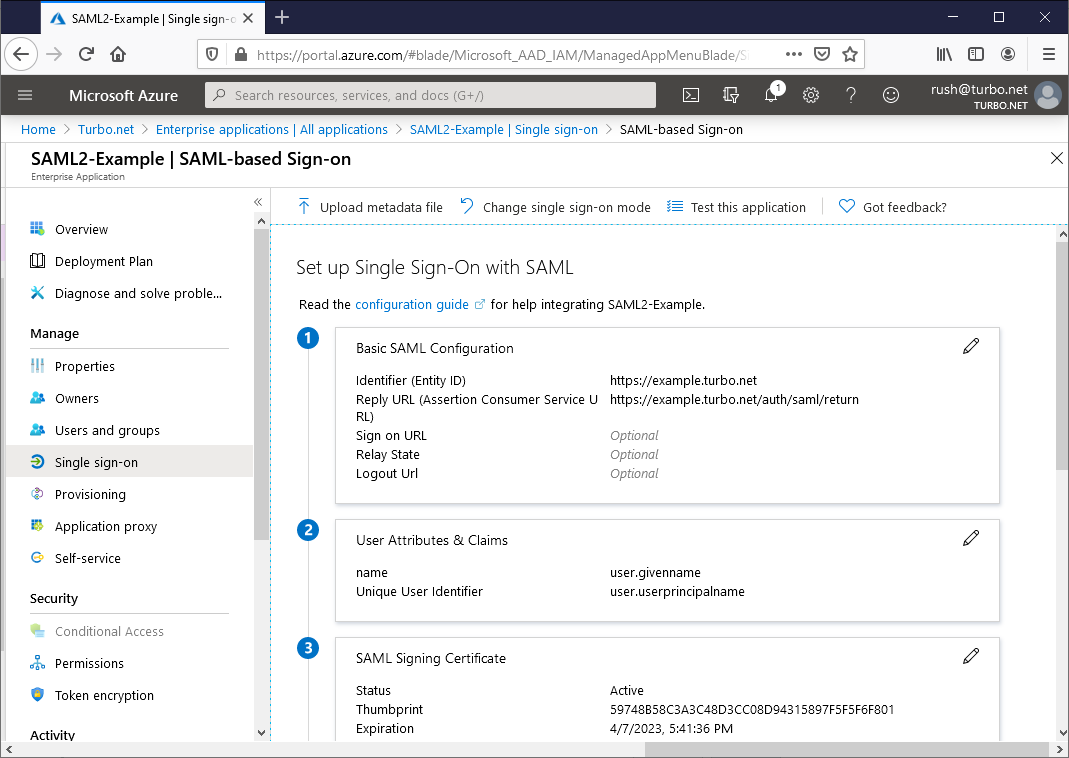
Once selected, the following configuration sections will be made available. For each section, please update or make a note of the following settings:
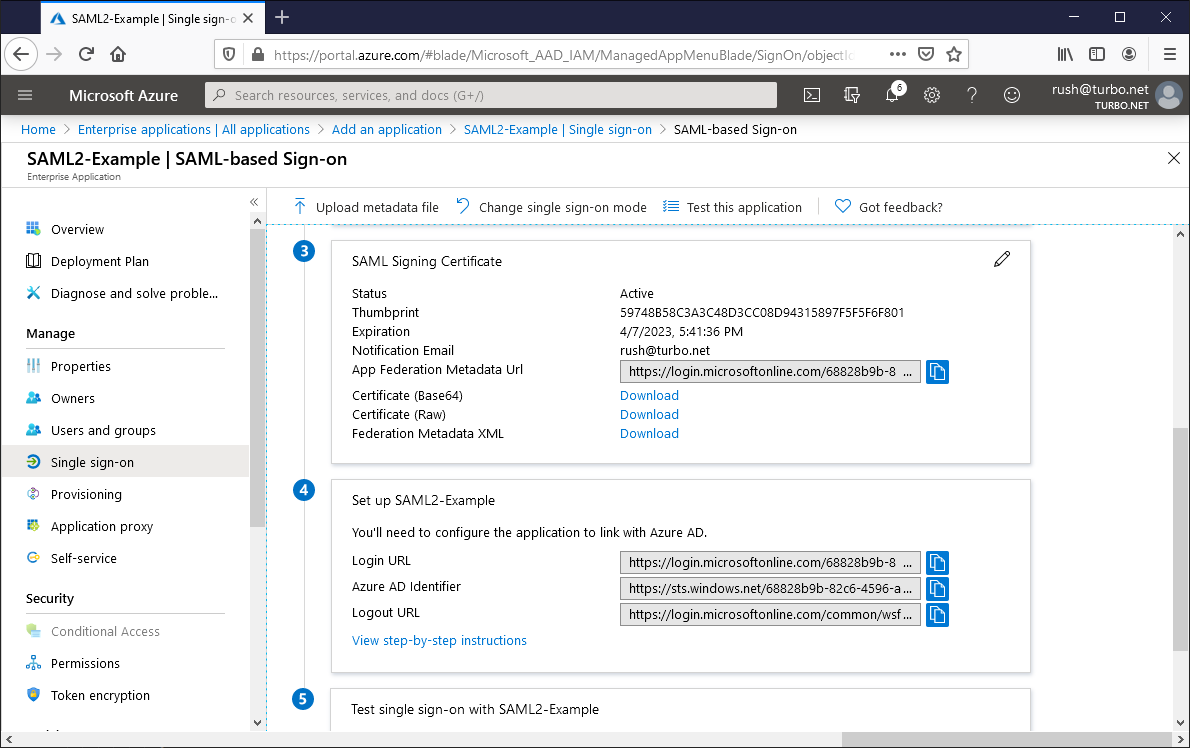
Basic SAML Configuration
- Identifier (Entity ID): - A unique identifier used as the audience of the SAML response. For example:
https://example.turbo.net. Update and save this value in order to configure it in Turbo Server. - Reply URL (Assertion Consumer Service URL): The default reply URL for the SAML response. This must match the endpoint listed on the Turbo Server authentication method page. For example:
https://example.turbo.net/auth/saml/return.
User Attributes and Claims
-
Unique User Identifier (Name ID): The claim that will uniquely identify the user and will be used for their Turbo Server username. This claim must have the following properties:
- Namespace:
http://schemas.xmlsoap.org/ws/2005/05/identity/claims - Name:
nameidentifier - Format:
Email address - Source Attribute:
user.userprinciplename
- Namespace:
-
Given Name: The claim that will be used for the user's first name display in Turbo Server. This claim must have the following properties:
- Namespace:
http://schemas.xmlsoap.org/ws/2005/05/identity/claims - Name:
givenname - Source Attribute:
user.givenname
- Namespace:
-
Surname: The claim that will be used for the user's last name display in Turbo Server. This claim must have the following properties:
- Namespace:
http://schemas.xmlsoap.org/ws/2005/05/identity/claims - Name:
surname - Source Attribute:
user.surname
- Namespace:
-
Group: The group claim that will be used to assign group membership for the user in Turbo Server. This claim must have the following properties:
- Namespace:
http://schemas.xmlsoap.org/claims - Name:
group - Source Attribute:
DNSDomain\sAMAccountName - Emit groups as role claims:
unchecked
- Namespace:
SAML Certificates
Token signing certificate
- Thumbprint: The thumbprint of the signing certificate that will be used to verify SAML responses. Save this value in order to configure it in Turbo Server.
- Certificate (Base64): The signing certificate file that should be installed on the Turbo Server.
Verification certificates (optional)
- Require verification certificates: Enables SAML request signature verification. This setting must match the Request Signing setting on Turbo Server.
- Upload certificate: Upload the SP Signing Certificate (aka Request Signing Certificate) file that corresponds to the Request Signing Private Key configured on Turbo Server. See Configure the Service Provider Signing Certificate for more information.
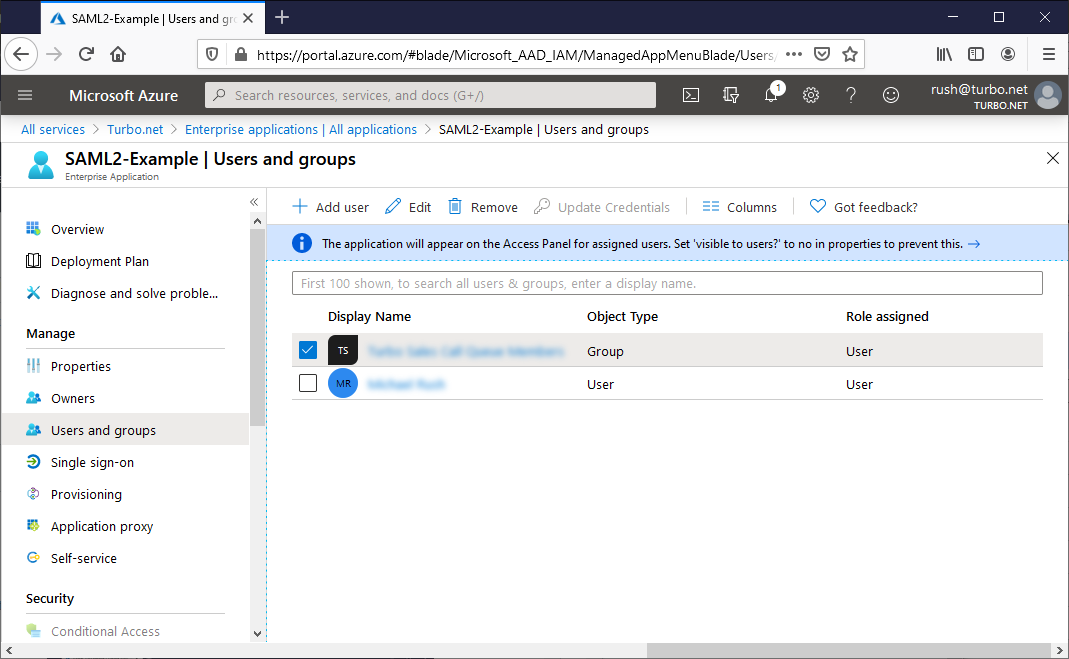
Users and Groups
On the Users and groups tab, add the users and groups that will have permissions to login with this application.
Configure Turbo Server
Once you have configured Azure AD, you are ready to enable SSO on Turbo Server.
Open the Turbo Server administration site and navigate to the Users > Authentication Method page. Change the Authentication Method to Single Sign-On and the Single Sign-On Method to SAML 2.0.
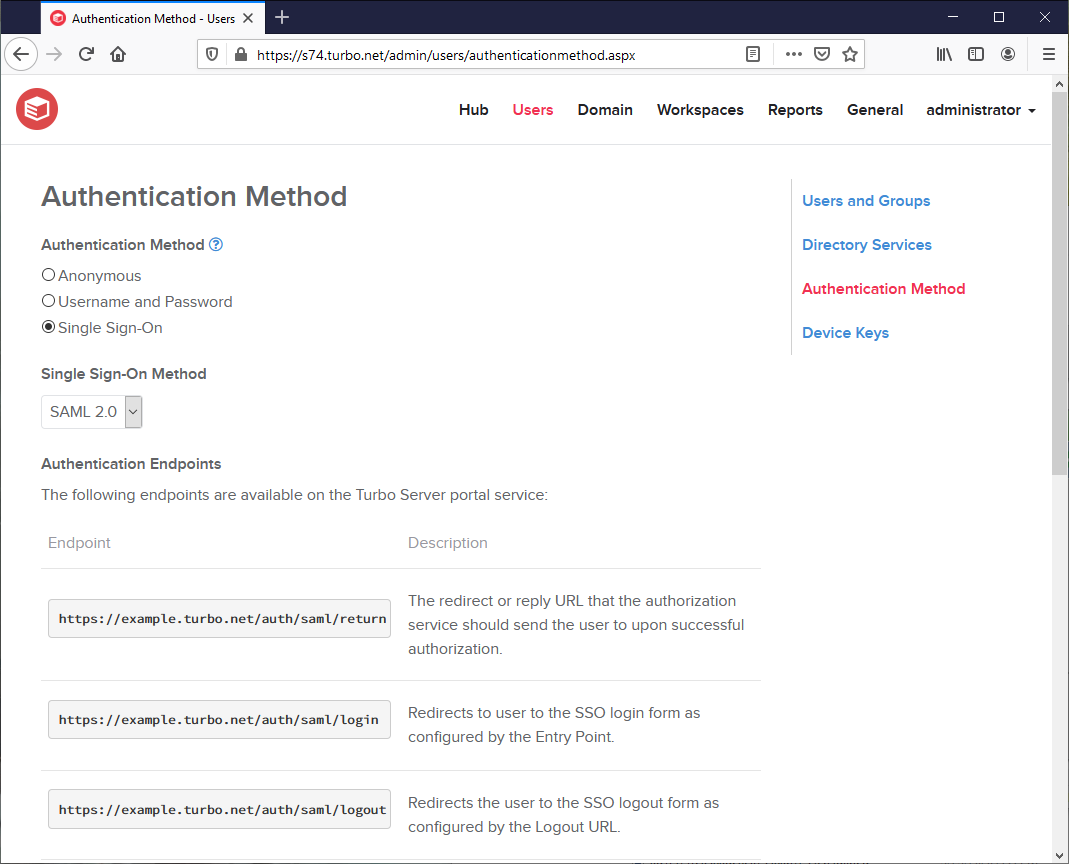
Fill in the following fields according to the Azure AD configuration:
Service Provider Settings
- Entity ID: The Identifier (Entity ID) as configured in Azure AD Basic SAML Configuration section.
- Request Signing: The Require verification certificates setting as configured in Azure AD SAML Certificates > Verification certificates section.
- Request Signing Private Key: The private key of the SP signing certificate. See Configure the Service Provider Signing Certificate.
- Request Signature Algorithm: The signature algorithm of the SP signing certificate. See Configure the Service Provider Signing Certificate.
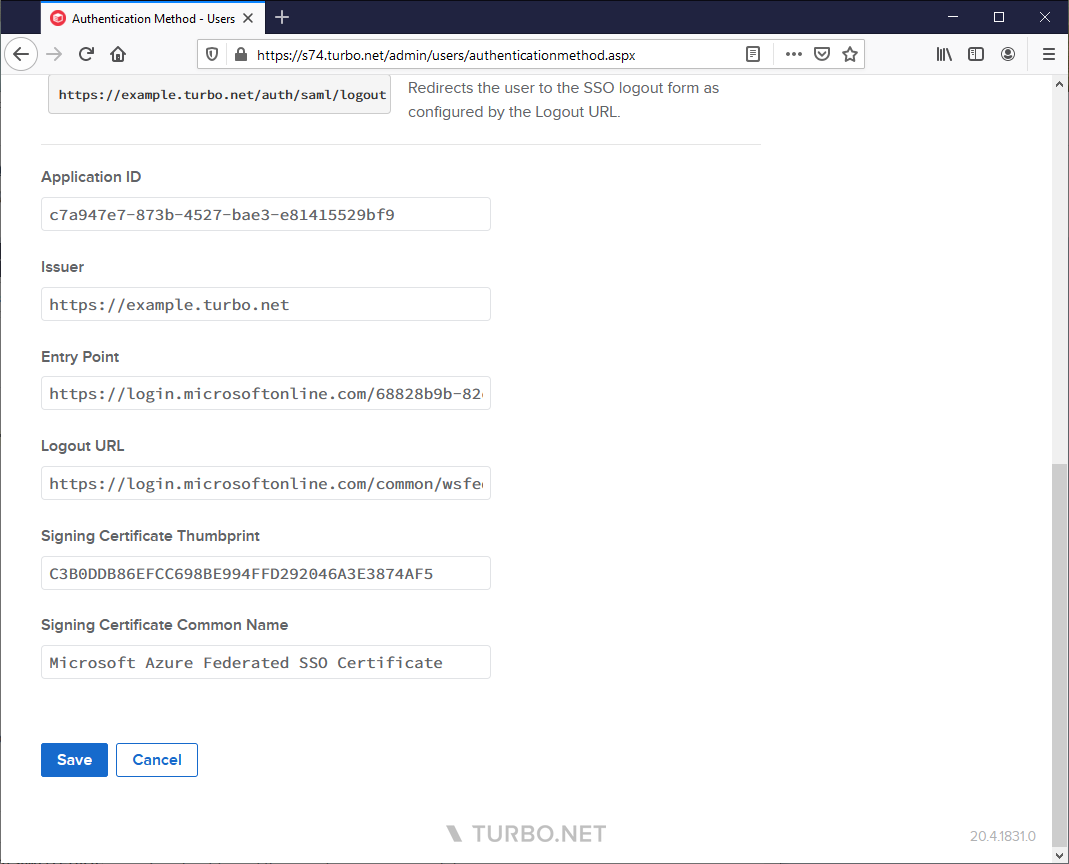
Identity Provider Settings
- Entity ID: The Application Id as configured in the Azure AD Overview section.
- Entry Point: The Login URL as configured in Azure AD Set up [Application Name] section.
- Logout URL: The Logout URL as configured in Azure AD Set up [Application Name] section.
- Signing Certificate Thumbprint: The Thumbprint as configured in Azure AD SAML Certificates > Token signing certificate section.
- Signing Certificate Common Name: The Common Name from the Certificate (Base64) as configured in Azure AD SAML Certificates > Token signing certificate section.
Install the Identity Provider Signing Certificate
The Identity Provider Signing Certificate is used by Turbo Server to ensure that the SAML response is signed by the expected identity provider. This certificate must be manually installed on the Hub server.
First, download the certificate from Azure AD. This can be found listed as Certificate (Base64) in the SAML Certificates > Token Signing Certificate section:
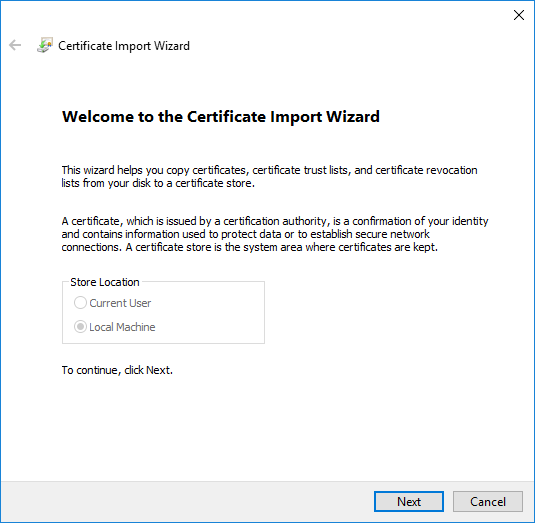
Next, login to the Windows Server machine that the Hub server is installed on as an administrator. Install the certificate with the following steps:
- Select Run from the Start menu and enter
mmc. - Click on File then click Add/Remove Snap In.
- Select the
Certificatesoption then click Add - Select Computer account, select Local computer, and then complete the dialog.
- Click on the new Certificates Snap In, then click All Tasks > Import...
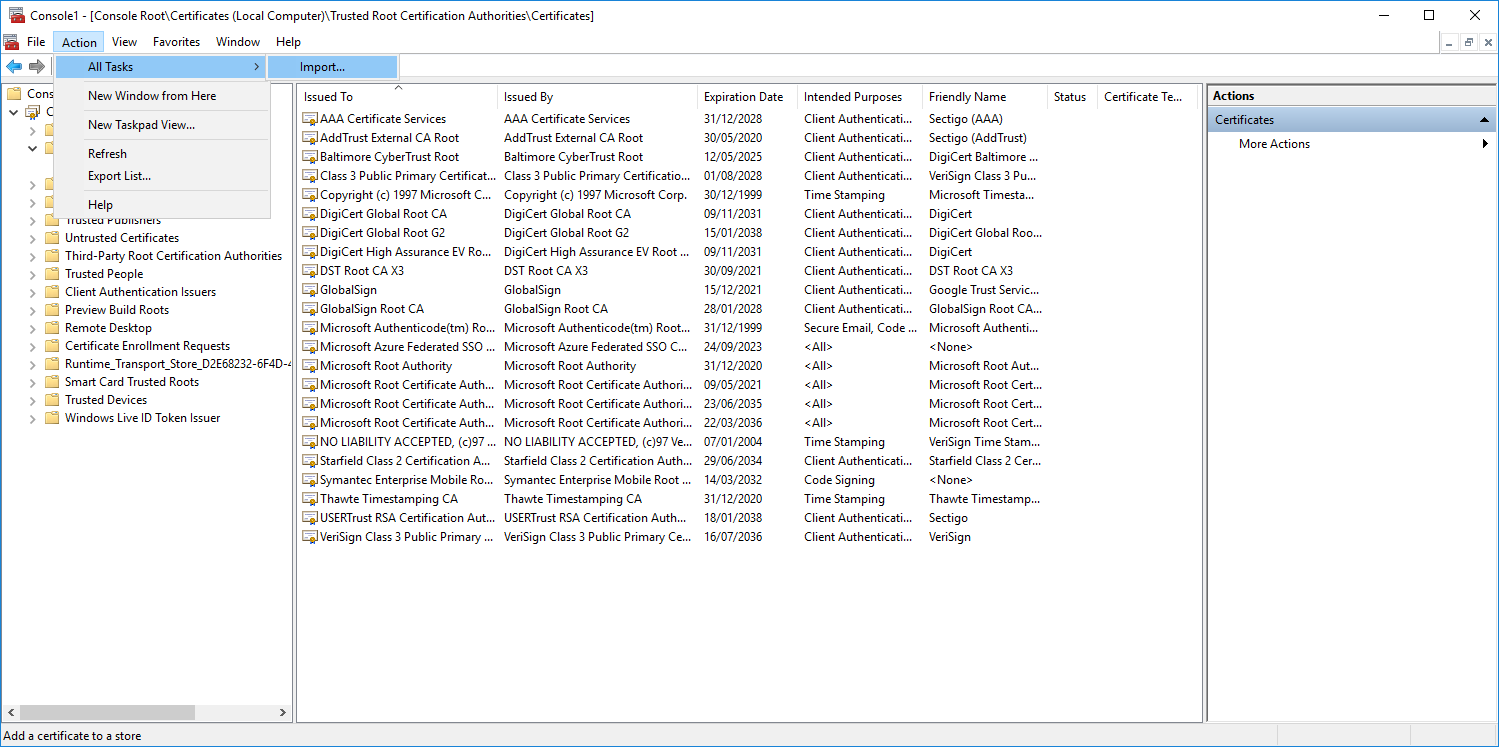
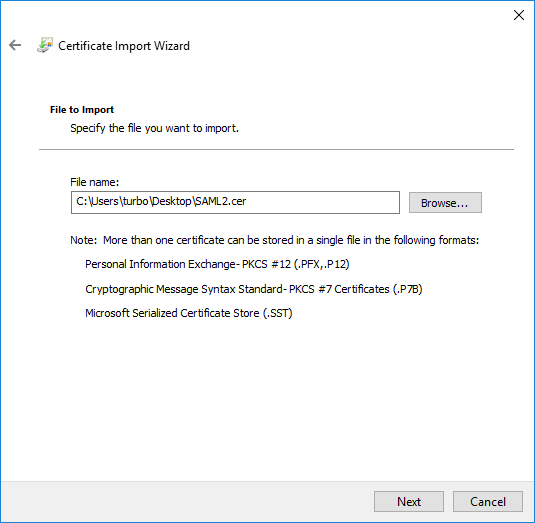
- Select Local Machine and click Next
- Select your certificate and click Next
- Select Place all certificates in the following store, select Trusted Root Certificate Authorities, and then click Next
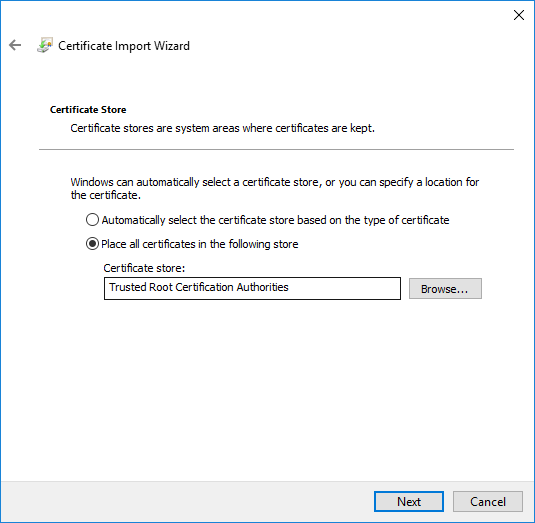
- Complete the rest of the import wizard with the default options.


Once installed, Turbo Server portal logins should now complete successfully.
Configure the Service Provider Signing Certificate (optional)
The SP Signing Certificate (aka Request Signing Certificate) and its associated private key are used by Turbo Server to sign SAML authentication requests sent during login. This signature allows the identity provider to verify that the request originates from the expected service provider.
To generate this certificate and private key, please refer to the Service Provider Signing Certificate documentation.
Once generated, Turbo Server must be configured with the respective Request Signing, Request Signing Private Key, and Request Signature Algorithm settings. The certificate must also be uploaded to Azure AD under the SAML Certificates > Verification certificates section. See SAML Certificates for more information.
Azure AD Multi-Tenancy
Multi-tenancy allows users from different Azure AD tenants to login to Turbo Server using the same SSO configuration. It is recommended to switch to Azure OpenID to enable multitenant authentication.
Troubleshooting Azure AD via SAML 2.0
AADSTS50105: Your administrator has configured the application to block users unless specifically granted access
When Assignment required? is enabled for the Azure AD Application and the user is not assigned access or is not part of a group with access to the application, the SSO login fails with the following error message:
AADSTS50105: Your administrator has configured the application [Application Name] ('[Application ID]') to block users unless they are specifically granted ('assigned') access to the application. The signed in user '[User ID]' is blocked because they are not a direct member of a group with access, nor had access directly assigned by an administrator. Please contact your administrator to assign access to this application.

To grant access to all users in your Azure AD, disable Assignment required? in the Azure Portal > Enterprise Applications > Application Name > Manage > Properties.

To limit access to specified users and/or groups, use the Add user/group button in Azure Portal > Enterprise Applications > Application Name > Manage > Users and Groups. When using groups, ensure that the allowed users are direct members of the specified group.

General SAML 2.0 Troubleshooting
Please refer to the SAML 2.0 Troubleshooting section.